


I thought this might be a good time to talk a bit about how we make sourdough at Companion Bakery. Partly because after 2 years I am currently quite happy with our sourdough process, and partly because Poh's Kitchen (ABC TV, Australia) are about to broadcast an episode that includes our bakery.
That episode will screen on ABC1 (Australia) at 8PM on Wednesday August 31, 2011. If you miss that screening, or are not in Australia, view Poh's episodes online at http://www.abc.net.au/tv/pohskitchen/episodes/
Poh and crew were sensational to work with btw, but I'll leave that to another post.
Where to start...?
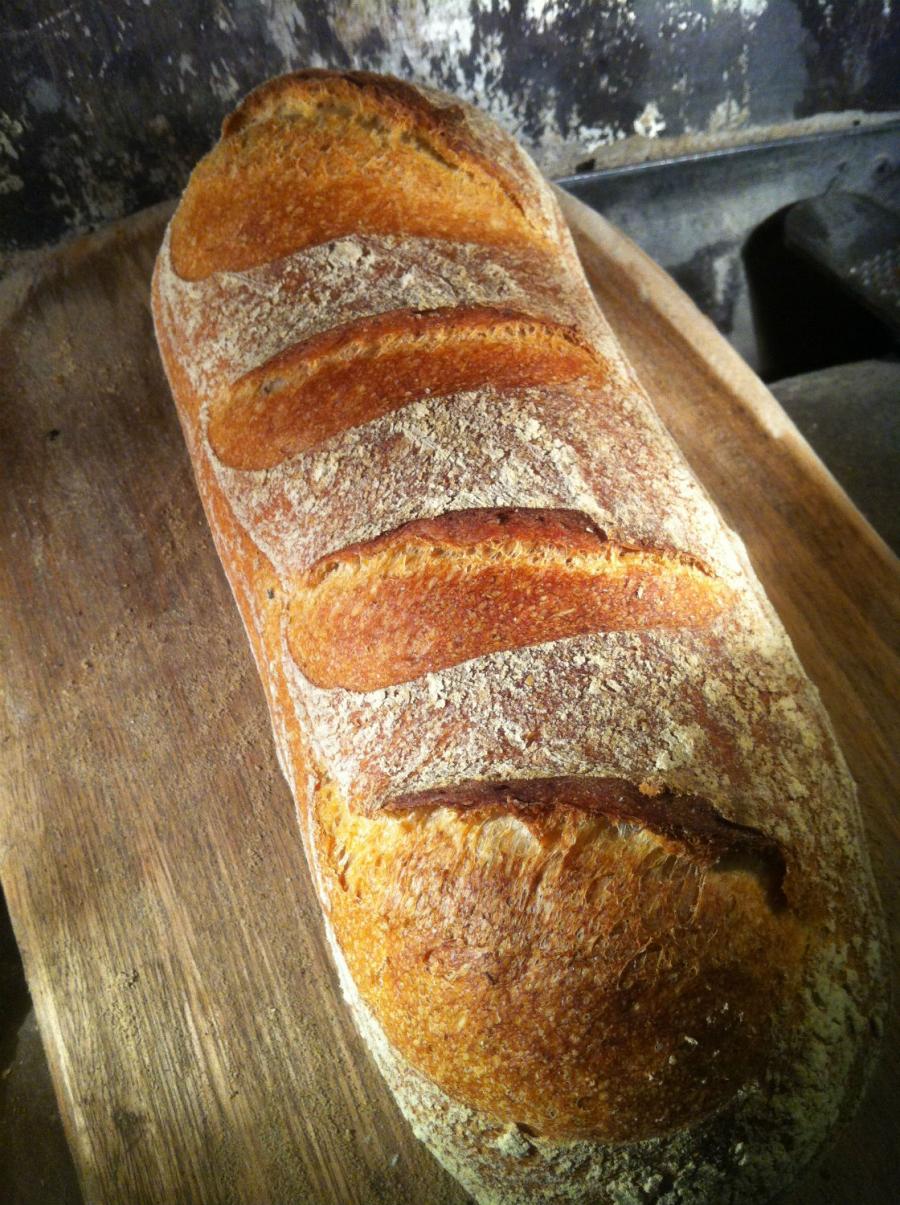
With the finished bread of course!!

This post will look at our lightest freeform bread, which we call 'Country Batard'. The 'country' part of the title refers to whatever flour happens to be in the starter...which is always a local (Callington Mill) stoneground wholegrain flour of some description (normally wheat, sometimes spelt).
The remainder of flour in batards is usually Callington Mill light-sifted wheat wheat flour, but at present I am using a South Australian roller milled flour because locally light-sifted flour is temporarily not strong enough to make light batards. This is the only dough we make that requires a high performing baker's flour...all the other doughs are adaptable to seasonal changes and local flour has always been suitable.

My philosophy regarding flour is to use local (Tasmanian) Organic where possible. If local Organic is not available, I will consider local 'Chemical Free'. We are strict on the 'chemical free' claim and send the grain or flour to a lab for a C3 chemical test (I'll post a copy on this blog later). If there is no suitable local flour, we will use Organic flour imported from the mainland.
We don't use any additives, including ascorbic acid or gluten flour.
Part of the reason we moved to Oatlands was because of the impending revival of Callington Mill, which is located opposite Companion Bakery. The mill is now fully operational and where most of our flour is sourced...

Process
process actually varies quite a lot depending on conditions such as flour type, water and air temperature, as well as the way baking shifts are organised.
My preferred schedule is as follows:
0700 - Begin to mix dough (water temp below 15C if possible)
---- see recipe below ----
0710 - Begin to bake dough that was shaped the previous day
0730 - 0800 - Dough mixed
0800 - 1000 - Bulk fermentation (at a finished dough temp below 18C)
1000 - Loaves (shaped previous day) are now baked. Oven Clear
1000 - Scale and ball dough (then 1 hour proof as balls - below 18C)
1100 - 1200 - Shape dough and place in forms (then 3 - 4 hours rising in forms at below 20C)
1500 - 1600 - Place proven loaves (approx 3/4 proven) in low temperature room (below 6C)
- we use a natural cool closet when ambient air temp is low, otherwise a coolroom is o.k
- if using a domestic fridge, you may need to only 1/2 proof, not 3/4 proof, loaves - due to decreased cooling ability of domestic fridge (no, or less efficient blower)
0600 - Remove rising loaves from cool space
0700 ---- the cycle begins again.
Recipe
a number of points...
I have re-trained myself to begin the recipe with the Total Flour Weight (TFW) in the dough, then make a decision on how much of this TFW i wish to remove and acidify (in the starter).
A member of this forum (Danubian) first explained this technique to me, which is very obvious, but can be hard to grasp. It is not the most common way because sourdough bakers have been swayed to think like yeast bakers...with starter as a replacement for yeast.
Our recipe calculator on this site uses the most common way, but before long before we introduce an alternative calculator that begins with TFW rather than calculating it at the end!
....using this recipe as an example, let us decide from the very beginning that all the flour in the recipe will add up to 1000g
1000g Total Flour Weight TFW (this is all the flour in the dough, including the flour in the starter!)
--- 10% of the TFW flour (i.e 100g) will be acidified (simply means will originate in the starter)
--- Assuming the starter is half flour / half water (i.e 100% hydration), then
--- 20% of starter (i.e 200g) will contain 100g of flour
Expressed another way...
1000g TFW is composed of:
900g fresh flour
100g acidified flour - which comes from 200g of starter!! (starter is half flour / half water)
Why calculate recipes like this? Well, it provides certainty about how much flour is in the recipe from the very start, and standardises baker's percentage for sourdough bakers as a percentage of the total flour weight.
The problem with the other method (which i am not going into detail here because that is not the role of this post and it could get confusing) is that bakers frequently calculate starter as a percentage of fresh flour added, and salt as a percentage of total flour added....but some bakers calculate salt as a percentage of fresh flour and simply up the percentage to compensate for the flour in the starter!
and...
sourdough bakers also have a habit of talking about dough hydration but rarely specify whether or not they are talking about the hydration of the fresh flour only, or hydration taking into account fresh flour and the flour (and water) in the starter! Most commonly they mean hydration of fresh flour only....and that is just not right!!
Back to the Recipe..
(TFW = 1000g = 100%)
900g light sifted or other light wheat (or spelt) flour
200g wholegrain flour starter (contains 100g acidified flour) (note that this is 20% of TFW)
20g salt (2% of TFW - we use a wet salt - if you use dry salt reduce to 1.8% or18g)
500ml water (this is a beginning point only! it is very likely you will need to add around 150ml more water!)
That's it!
I'll explain more about starters, mixing, proving and baking as the blog continues...
--------
30 August 2011
Hi again.
Thank you for all the nice comments btw.
Starters
I basically use two starter methods at Companion Bakery.
The first is the very common single stage method....where a bit of leftover starter from the bake is "fed" with fresh flour and water, and left at room temperature for up to 24 hours (depending on temperature). I very rarely manipulate the water temperature when making this starter.
I also call this method the 'Contimuous Method' (see notes below)
The second method i call the dough ball method. This is a two stage method where a cool, stiff ball of starter is used to inoculate a warmer, wetter mix of flour and water.
The dough ball process evolved partly from experimentation early in 2009, burying stiff doughs in about 1metre of earth, playing with the idea that this might be a good way to get a starter going in a hot climate ( I liked the idea of cutting a 5 day old ball of dough in half and somewhere in that cross-section is the perfect environment for yeast and bacteria to thrive), and partly from a discussion with Kingsley Sullivan.
Those dough ball experiments of a few years back produced some of the most gruesome pieces of dough I have ever seen. Even the balls that were held in containers somehow managed to take on a deep dark smell of red volcanic soil. The uncontained balls, buried without protection, looked unsavoury - but I did manage to rise dough and make bread within a day or two of harvesting the balls (the bread smelt and tasted 'musty' and was not nice to eat).
Thankfully I left those dark experiments in steamy Queensland. I can't even bear to look at the photos any more, but here are some links to pics if you want to be sick:
Note: These photos are of experiments and are not the type of starter ball used at our bakery or in bread recipes on this page! (I'll put some current pics up on this page soon!!)
http://sourdough.com/gallery/v/user/Graham/starter-ball
A few months later, in cooler conditions, I experimented above ground:
http://sourdough.com/gallery/v/user/Graham/starter-ball_001
Photos above are of balls made without any addition of active starter. These experiments were an attempt to cultivate new starter, not feed an existing starter.
At some stage I was speaking with Kingsley Sullivan, of New Norcia Bakery in W.A, and he described the warm fermentation method that had been used for eternity by New Norcia, an old monastery.
Kingsley explained that, in his experience, 33.5C was the maximum fermentation temperature, after which activity begins to fall off. He said that at that temperature it was possible to have a starter ready in 2 hours. However Kingsley preferred temps a couple of notches down (I forget the exact temp) that took about 4 hours.
At that time I was shocked and disturbed at the concept of a warm and fast sourdough fermentation. It didn't fit my perception of sourdough as a long process that needed to be long to successfully break down less digestible components in the flour (my view has since changed). Up until then i had only ever made 12 - 20 hour starters.
We moved to the cool climate of Tasmania about 2 years ago, and as soon as we arrived i started working working with cool-fermentation. The dough ball was back, but this time it was held in various vessels in ambient temperatures ranging from 2C - 15C, which is common for the Mount Field area in Winter.
Stiff-cool conditions hold yeast and bacteria in 'stasis' (love that word...hopefully i am not butchering its meaning too much) and generally favour fruity smelling acetic acid production over lactic acid production. In these conditions the starter can be added to dough successfully for at least 24 - 48 hours and leaven / acidify dough in favourable ways...with older starters obviously being well suited to rye bread (3 day old stiff/cool starter is fine in rye).
It was a natural progression to try and 'wake up' the dough ball using one of Kingsley's hot starters. This two-stage method produced a highly active 2nd stage, as provided the chance to combine fruity acids from the dough ball, with warmer (lactic) acids of the 2nd stage.
I would like to note that although there is a lot of talk about the types of conditions that favour acetic and lactic, i don't think that there is extreme clarity when it comes to working with these conditions reliably by small artisan bakers.
We are largely working by feel and intuition...i am the first to admit that sometimes intuition is formed around bogus theory and mis-read observations....but hopefully not too many of those! It is important to continually re-assess process!
 Mature stage 2 starter, made from dough ball method. Initial temperature was about 30C, dropped to 15C at ambient room temperature over 10 hour period
Below are some points about each starter method, extracted from notes i provide to students at our Sourdough Workshop:
Single Stage / Continuous Method
Keep a small amount of active starter aside, which can be 'fed' to make a fresh starter by adding more flour and water. 100% hydration (same amount of water is there is flour) is very common, though i think there is a trend in Australia to make stiffer starters, such as 50% hydration (half amount of water as there is flour). 75% hydration is a great median!
The starter can be used and fed daily. However if you do not want to make bread every day you still need to feed (refresh) your starter. If the starter is not refreshed regularly it will become unhealthy and eventually expire.
To avoid creating mountains of starter, you can discard (compost or feed to animals) most of the starter and feed as above. This discard / feed process can continue until you are ready to make bread again.
The advantage of the single stage starter is its simplicity....
you have one vessel containing starter, which is fed and fermented until it is 'ripe' and ready to add to your bread dough. Don't use all the starter...leave some starter in the vessel....mix in more flour and water....wait 8 - 24 hours...and make bread again....leave some starter in vessel...mix in flour and water...etc.etc.
The disadvantage of continuous method is:
your starter is 'ripe' but you are not in the mood to make bread! Oh dear....some of the starter needs to be 'discarded' (hopefully composted)...to make room for a 'feed' of fresh flour and water.
if you do not feed your continuous starter regularly...it will go very acid, fermentation will slow down, mould will appear, and it will become 'sick' and eventually give up.
Starters can be rescued within a week or two of loosing activity...providing they are kept cool. A ripe starter will only stay close to its peak for 1 to 4 hours, depending on temperature. Refrigerating a ripe starter can extend its usability out to 8 hours, even further with stiff starters
 Mature stage 2 starter - close up
Dough Ball Method (Two Stage Starter)
This method is characterised by a stiff, cool 'seed' starter (called Stage 1), which is used to a activate a wetter starter (Stage 2).
Stage 1
The starter ball is kept stiff and cool in the fridge or cool closet for days, weeks or months until needed.
Stage 2
The baker removes the ball from the cold and adds it to a warmer, generally more fluid mixture of flour and water. This 2nd mixture is called Stage 2.
Their are many advantages to this method.
The starter ball slows down activity of wild yeasts and bacteria. Amazingly, during day 2 and 3 of storage the ball is often active enough to use 'as is' to make bread dough...it is not essential to make a stage 2. However making a stage 2 adds strength, reliability, flexibility, flavour....and is highly recommended!
Stage 2 can be warm, cool, soft, stiff....as you please. At Companion Bakery we often make a very warm stage 2, at around 28C to 33C. At high temperatures like these, stage 2 can be ready to use in bread dough (ripe) in about 4 hours. (Note: Sourdough starter is likely to suffer reduced performance at temperatures above 33.5C).
One feature of warmer, wet fermentation is the creation of a higher amount of lactic acid, compared to acetic acid. This combines well (in my opinion) with the more fruity acetic acids present in the cool, stiff dough ball.
Stage 2 fermentation can occur at lower temperatures too. For example: from 8 hours at around 24C to 16 hours at around 15C. These temperatures are a guide only! One indicator that your starter is ready 'ripe' is when it has reached peak rise and is about to collapse. Personally I like to see a small, natural collapse (rather than knocking the starter vessel to force a collapse).
Making a dough ball is easy:
you simply use flour to thicken up wet starter (such as stage 2 starter) left over from making bread dough. I always use Organic wholegrain flour to make my starters. Starter balls generally have the consistency of plasticine, but consistency can be varied and experimented with.
A good size dough ball for home use is about the size of a golf ball. Store it in a ceramic or glass cup, or a food grade plastic vessel. The lid can be loose fitting (like a saucer) or tight fitting.
Graham
Videos above show the action of our spiral mixer, which has been specially modified to provide continuous speed mixing, using a variable speed drive.
Very slow mixing of dough is possible, for instance it takes 1 full hour with the spiral at slowest speed to mix rye/spelt dough (contains approx 50/50 rye/spelt).
This mixer was specifically selected because it does does not have a breaker bar, but rather a smooth conical pillar, which further reduces mixing intensity. Spirals with breaker bars can be low intensity if slow speeds are possible and plenty of dough resting takes place (rather than non-stop mixing).
Replies
I am retired living in the UK. I've taken up baking as a hobby and got completely hooked on sourdough - but for me sometimes it works, sometimes not. So - I will follow what you say for a professional touch!
Hi Graham,
Very nice bread indeed ! I'd love to taste it.
Sadly, in UK we don't get ABC and the internet broadcast is not available here (out of Australia).
After all, maybe I'll be able to taste your bread sooner that I would have thought... ;-)
I hope everything is well for you in the beautiful Tasmania.
Cheers,
--
Eric
Are you coming to Tasmania Eric?
I hope so! It would be very good to see you (and family?) again.
We have well and truly settled here now...and we have a good place to stay at which is close to the bakery and mill.
Hope all is well for you too.
Graham
Thank you for your the information in your blog. I've been interested in how commercial bakers make their sourdough. (That is, what do they do differently from home bakers.) I'd be interested in hearing more about the starter you use. Presumably, it it responsible for the huge holes in your crumb. While I get various size holes, I never get the huge ones. I'd like to know what causes that so I can duplicate it.
The starter is obviously very important, and I will add more about this to the blog today.
What might interest you is that the way i make starter, and the quantity i add to the final dough, changes all the time.
At the moment I am enjoying working with a stiffer (like Plasticine) starter that is fermented in cool conditions (around 12C - 15C) for about 20 hours. This is a single stage starter, which is simply a result of feeding the starter from the day before.
Other times I will first create a 'doughball', similar in consistency to the cool stiff starter above, and then use that doughball to inoculate a warm (26C to 33C) and wet mixture (like we pancake batter) and make a 4 - 5 hour lactic starter. This is a two stage starter.
And i use variations between the two methods above. Note that i'm currently using about 20% starter...however by calculating starter off TFW I am actually adding quite a lot less than the average in Australia, which is around 30% - 40%, calculated as a % of the fresh flour added.
At the risk of sounding pedantic, under ideal conditions (all variables lining up nicely), i have found that 18% of TFW works well, but 15% is too little...using the methods that i use! (for this type of dough. i frequently use 60% - 80% starter for our rye/spelt bread, for instance).
It all depends on ambient temperature of water, air, flour, as well as the hours available for me to bake in, and the characteristics of the flour - mostly in relation to the falling number of the flour.
Now i am not trying to scare home bakers off by rattling on about these variations, which may seem technical to you. Infact almost every variable can be monitored and controlled during the dough forming, proving, baking process without every having to think deeply about precise technical information.
If a home baker, or any baker, is aware of how dough should look, feel, smell during fermentation, then they can produce bread which is well fermented, digestible and looks just as good...probably better...than bread out of a highly controlled technical bakery.
What is important re starters is to remember that you are not just trying to develop gas in the final dough, but you are aiming to condition the dough to a point that suits the style of bread you are baking, suits the way you shape and prove dough, suits the oven you are aiming for, suits the way the final loaf will be stored.
Conditioning is largely 'acidifying the dough'. This acidification is a result of the fermentation methods you as baker have selected...from starter to bulk proof to intermediate proof to final proof. In my opinion producing a suitably conditioned (suitably mature) dough is one of the major skills of being a baker.
Considering my above statement, you can see why I believe that bakers who go to all this trouble to condition dough entirely using natural fermentation...lots of skill and knowledge needed...need to be recognised for that work.
Please let us not start an ascorbic acid debate in this blog!!
I'm not surprised to hear that you vary your starter. I've already figured out that I've got to watch the ambient temperature for counter-top bulk fermentation. But, as long and you're going to do starter, tell us what conditions your have to make allowances for.
Hi Graham
I bake sourdough at home and have tried out the method on this website,
Will try out your calculations in weighing the flour and starter etc.-
Looking forward to seeing your bakery on Poh's kitchen.
M
This is good info. I have always known that my home baking needs more discipline in measurements of ingredients, and I too have noticed that a lot of recipes ignore the flour/water content of the starter.
I will go back to 50% hydration for my starter - you have spelled out a good clear calculation for consistency.
Thanks for the heads up on Poh's Kitchen, Graham - have set to record.
Anyone who misses it on Wednesday can see it again on Saturday at 6pm on Channel 2 - or view it from the web on iView.
When I was last in Tasmania, Callington Mill hadn't been revived and the bakery was yet to launch - but can I recommend the trip to historic Oatlands is very worthwhile for anyone going to Hobart. It's slightly off the beaten track, unless you're coming down the Midlands Highway from up north, but a lovely day trip is to head up through New Norfolk to Hamilton (see the Catholic cemetery and a stunning private garden which is open for visitors - on the road to the tip!), then up to Bothwell, and across to Oatlands. You can also come back through Richmond, but probably better to devote more time to the other towns and see Richmond another day.
Interesting to see your temperatures. Having baked SD at home for about 4 years now, I have slowly migrated to lower temps and shortish bulk ferment time through the process. This means that in summer I am cycling the dough (between short kneads and for partial periods between stretch/folds) in and out of the fridge. It just seems to give a better result, for me. I find that if I let it get anything significantly over 20C, like 25C or more, it runs away with presumably gluten breaking down - the final bread is then "brittle". So much stuff I have read talks of temps way over 25C and long bulk ferment periods that would leave my dough as ooze, before even shaping, let alone after proving. Although mayber their levain:bread dough proportion is far lower.
Also, I'd be interested in what the inside of your dough looks like at the end of your cool and not over-long bulk ferment. I find that if the dough has puffed and is "billowy" and there are significant holes in it (and it's anything like doubled), it will have overproved after going into the (domestic) fridge overnight - although I do have to leave it there around 22 hrs, what with going to work. I find it better if the dough is only slightly risen in the bulk ferment, and the holes are certainly there (on scaling) but only teensy. Perhaps thermal interia is relevant - my loaves arer typically about 930 g each, and when bagged I imagine it retains some of that 20C temp for a long time.
I'm also interested in your water flexibility - Danubian (a fellow fly-fisher) gave me a number of really helpful emails when I got going and one thing I remember him saying was not to obsess over hydration as the "right" hydration would vary with - for instance - flour type/ mix and humidity, every single batch. This also suits me as my starter hydration is a bit of a movable feast - I keep it a bit wetter than bread dough - which basically is because it's as firm as I can keep it while still being easily mixed in with water when making (what I call) levain!
Thankyou Graham for such an informative and interesting post. It is also great to hear that a place like yours, and artisan bread baking will be on prime-time television.
I was interested to note your formula development beginning from the total flour. I'm currently training in San Francisco and that is how we do it here as well.
Thanks Again,
Craig
Graham thanks for the post and how you are looking at flour percentages in the bread and where the source of the flour comes from. The spreadsheets that I use to bake with have overall hydration, and salt in bread. I found it useful in making adjustments to the normal baker's percentages to get the overall percentages that I wanted. Doing this just seemed logical to me but I'm glad that you explained it so well.
Graham, can't wait for your next installment!
While my bread has been very tasty and we've eaten the lot, it is still too heavy so I'm very keen to find out how to get it as light as yours, without undertaking a chemists degree.....
We passed through Oatlands in March while on a tour of Tassie, and saw the mill. Didn't stop though.
We think Poh is the best cook on TV, as she is so natural and likable. Will be watching with added interest now.
I like your approach of communicating essential info while keeping it all accessible to the non-technical among us.
Older brains (mine, at least) don't like complicated or tricky techniques.
Graham, Having baked REAL Sourdough (flour-water-sea/river salt-levain) for many decades, one must say, great post/thread. REAL HONEST BREAD WITH WHOLESOME INGREDIENTS & INTEGRITY...!! BRAVO
Thank you for all your nice comments.
I have just put up some more infomation on our starter methods.Tomorrow i'll try to make the page more readable with some pics.
And also try to answer some of the queries here.
Graham
Very nice post - and fantastic looking bread! I'm looking forward to seeing the show.
I'm rather encouraged by your recipe and timings, because it's not that far from what I'm doing at home. Perhaps my next experiment will be dough balls at the bottom of the garden!
Hi Graham, beautiful bread! It's the lightest looking sourdough I've ever seen. Is it to do with the flour?
Hi Graham,
I watched your video with Poh's- you should do more TV! You have a very warm manner and came across like an artisan baker should... engrossed in the process of creation of the daily bread whilst going with the flow.
I miss the wood fired oven too (bought a great electric oven but would love having my Scotch oven again too) ... maybe one day if we manage having a holiday in Tasmania I might pop in or even have a day baking together? It's a nice thought for me anyway.
Hi Graham,
Glimpsed the Bakery sign as the Gourmet Farmer went by to visit the mill. TV cameras must have been a dime a dozen down that way recently.
Perhaps he should have called in for a bit of a lesson from you /;-{)}
Farinam
Hi Graham,
Thank you for your post and the recipe. I am new to the sourdough journey and been baking for a couple of months now, but the best result is from the recipe of this site..
Have just finished lunch - three slices of bread purchased yesterday from the bakery with tomato and olive oil - simply delicious!
We just managed to drop into the Companion Bakery yesterday on the way home to the ferry at the end of a wonderful holiday in Tas and I have to confess that I couldn't resist buying 8 loaves to keep me going.
Well worth a visit indeed if you are in Tas (and of course Tas is worth a visit if you are in Oz at all).
Was even able to chat to Graham.
We'll be back!
Thanks
Jon
Hi there Graham,
what is the weight of the sourdough that is pictured at the top of the page?
Thanks