Hi all,
I'm very new to sourdough baking here- this is my second batch, but I seem to be having some problems. Please bear with me whilst I try to get to the bottom of my wet, sticky, slumping dough.
I have been baking bread using commercial yeast by hand for years now, but my sourdough efforts in the last couple of weeks have been a disaster. The first batch didn't rise much, although was filled with lovely holes and tasted great, although not as sour as I hoped. Because the dough seemed too wet and my starter seemed to often 'split' so that I got a layer of water on the top I tried to thicken it slightly by adding very slightly more flour than water each day- About 100g water to 105g flour.
I then used about 80g of this starter to make a leaven, which floated after 10 hours when I came to dissolve it in water. I added the rest of the flour and gave it half an hour to autolyse before moving onto folding the dough every half hour for several hours.
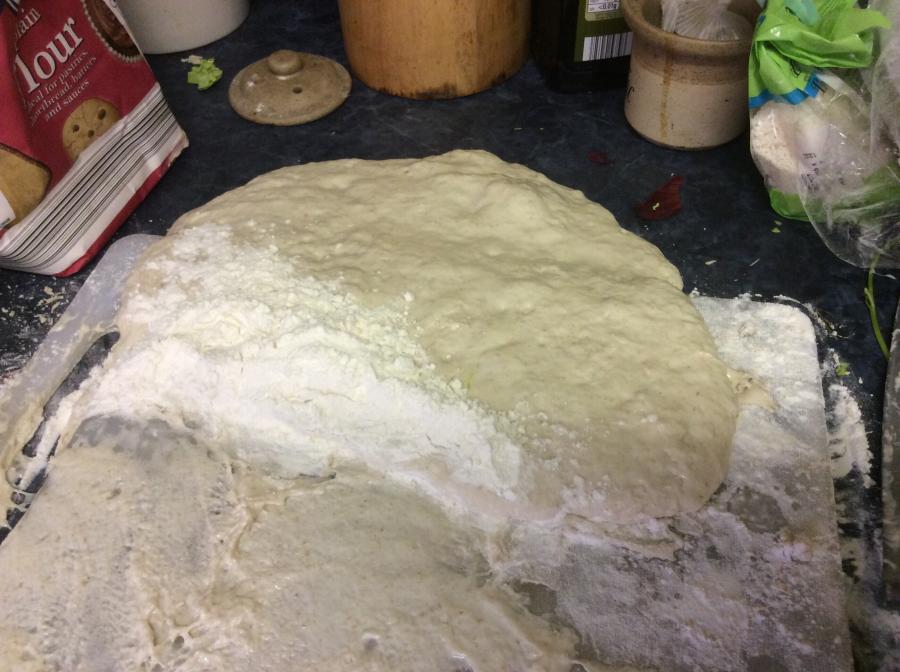
Unfortunately ive just woken up after giving it a 12 hr bulk rise and the entire thing rose and then slumped, judging by the underside of the tea towel, and when I poured it out to try to shape it, this picture is what happened.
luckily, I had my doubts about a 12 hr bulk rise so last night at the final 'turn' I whipped a third of the dough out and proved it for 12 hrs in the fridge. And when I placed it onto the baking tray this morning, it looked just as bad as the image above.
It has gone into the oven anyway as I might as well see what happens and it's no worse than my first batch.... In fact it looks much the same- a little oven Spring but pancake shaped!
so my question is.... How does a dough become too 'wet' and what does one do about it?
Is my starter at fault, or should I try a third recipe and hope that one works better for me?
If after the bulk rise it is really liquid, is there anything I can do to rescue it? At my mum's suggestion I have knocked it back and added more flour to make a proper dough ball, which is now proving.... But I'm worried I've now knocked all the air bubbles out of it! (But as you can see, there was no way I could have put the dough in the picture into the oven so it was worth a shot)
thanks in advance!
Replies
Hello woodsi,
A starter usually 'splits' when the food supply has been exhausted and the gluten breaks down which allows contained gasses to escape and the solids and liquid to separate. Changing the ratio of flour to water will not 'fix' this unless you progress to the 'stiff' starter stage.
A dough turns wet and sticky and collapses for similar reasons when it is overproved.
You don't mention what sort of temperature you are working at but I suspect that it is possibly quite warm and if you are going to be working at that temperature, the time frame that you have to work in has to be much shorter. If you have to work in a longer time frame, then you have to be at a lower temperature, possibly by using retardation in a refrigerator.
Once a dough is overproved, it is not a good idea to be trying to recover by adding flour because you mainly end up with a mixture of over-developed and under-developed flour in the mix which is the worst of all possible worlds. Also, trapped gas will be lost and new gas (rise) will not have been produced. Your best bet is to accept your fate and bake and enjoy the 'flat' bread that you produce or use some of the dough to inoculate a new batch of dough that is managed properly to produce a well developed and proven dough.
So, I would be thinking that you should work to a much shorter time schedule if you are going to continue at your room temperature. It could be as short as a couple of hours for development and pre-ferment and a couple of hours for proving. One guide that I have found useful is to monitor how long it takes for your starter to 'peak' (reach maximum volume) after feeding at your working temperature. If it takes four hours, then you should be looking at a total of four hours from mixing to baking and so forth. But even with this guide, you should also be monitoring the volume and texture of the dough (using the poke test) to determine exactly when the loaf is ready to bake. You really cannot blindly follow a time-line written up in a procedure unless you know and can reproduce the temperature profile that existed for the author of the procedure. Times will also vary with the season unless you have a system of precise temperature control and hence the value of becoming familiar with the look and feel of the dough as the process proceeds.
Stick with it and you will find that it will all become as commonplace as working with your yeasted doughs. I have found that the Pane francesa recipe given in the Beginners Blogs on this site (Home Page - right hand column) is a very good basic recipe to cut your teeth on. The techniques and tips given there are also very useful for the beginner.
Good luck with your projects.
Farinam