The earth has been broken, the oven is officially started! Going is slow but steady, completion is still months away. I'll get around to posting pictures etc some time.
if i can ask, what plan you follow with your project ?
i knew that regadless what oven i would build i would need a slab and got this done 2 months ago but i still didn't decided on specific oven designe
I purchased plans from Alan Scott @ [url=http://www.ovencrafters.net/]Ovencrafters[/url], he's now based back in Tasmania. "The Bread Builders" by Dan Wing has a lot of additional information about building using Alan's plans.
There's also another guy in Australia called Rado @ [url=http://www.traditionaloven.com/index.html]traditional oven[/url] that others have used for plans. I've read his site and looked at his pictures but have not viewed his plans of CDs of photos. Similar concept to Alan, but a number of differences I believe.
A close up of the hearth layers, bottom is the insulating layer, then the concrete and firebrick layers that form the thermal mass to store all that lovely heat
Here's a picture of the hearth all laid out. It is basically level and basically flat! A few high and low points which will make it a bit harder to sweep out before baking, about 3 slightly wobbly bricks (which I expect to bed down as ashes work down between the bricks) and the odd slightly wider gap. But all in all not too bad for a first time I think, the quality improved as I went.
I managed to layout back wall before I ran out of time (note that I'm using roading quality pavers instead of firebrick or red brick for the walls and dome). Next step is to finish laying out the oven walls and then mortar them in place. Then on to the dome and my first ever brick arch..
Looks really nice - One day I would like to have an oven too - I think though that my current house neighborhood will not allow for an oven like that in my back yard.
I'm using Alan's plans & Bread Builder's instructions but am having to convert everything from imperial and US products to metric and NZ products (blocks and bricks are different sizes here as well as being in metric). So it's going to come out a little different.
I'm a bit embarrassed on two fronts. One that it took almost exactly 10 months to post photos, and secondly that the oven still isn't finished. However the hearth is finally poured, and I'm ready to lay bricks! OK I've got to buy the firebricks and thermocouples first, but then I'm ready.
My brick oven to date, hearth slab poured, finally time for some bricks. YAH!!
Time for another update on the brickoven. I've actually got a bit further than this, I've now laid the front hearth and the 2nd and 3rd arches on the dome. So I'm almost ready to close in the dome. But those photos are still on the camera. I'll download them another time.
Here's what it looked like all braced up ready for the dome to go on the walls.
Mocking up the first arch.
Laying the first arch.
Much to my relief it held. it sagged slightly because I hadn't notice but the right hand side wasn't as tight to the template as it should have been, so the arch is a bit wider on the RHS than designed. I fixed this tendency in the next 2 arches, but you'll have to wait for the photographs to prove it.
Matthew, my dad built a brick oven about 10 years ago. It gets quite a bit of use for family events, and I can't recommend them highly enough. They went to a CAE course on baking bread in it, and the teacher of the course helped them build it.
Good luck with yours - I look forward to watching further building progress!
In fact, are those bricks used in the side and back walls, and the arch, refractory bricks? I can see the hearth constitutes refractory bricks but I can't tell if the others are.
The mortar is a portland sand mix modified with fireclay (3 parts portland, 1 1/2 parts fireclay, 10 parts sand from memory - the numbers just don't stick in my head, I have to check each time). The wall bricks are actually 65mm road quality clay pavers. Chosen because they are very dense and also were readily available and cheaper than both firebrick and clay brick (proper, solid, clay bricks are actually quite hard to find in NZ, they tend to be imported from Australia, the local bricks are generally half width facade bricks).
If the oven was going to be used every day I would have used firebrick for the wall and dome, and would have considered a proprietry refractory mortar. But realisitically this oven won't be used more than once or twice a month, so the advice I received from a number of sources is that the extra expense this would entail was not necessary.
how it all goes as well as see how it lasts over a couple of years.
I'd have thought making it in such a way to last more than one life time would be more prudent. Unless you plan on making another down the track for your children or grandchildren.
Beside that it looks like a great project and you seem to have it worked out.
From what I've been able to find out, the refractory bricks/mortar are really only necessary for repeated and frequent temperature cycling of the walls and dome.
I'd build for more than one lifetime in mind if I thought it likely that my children/grandchildren would be living in the same house after I die. But here in NZ that is extremely unlikely....
Also the firebricks cost me approx $6.60 each, while the pavers cost me $1 each. So their wasn't really too much consideration given to using firebricks throughout once I was confident that I didn't really need them.
Will keep posting as I go, but can't promised that it will be finished anytime soon based on experience to date :)
Now I see that i've posted this twice...... I came back in and couldn't see my original reply, so did it again. I'm still getting used to the new site.
I'm using a portland mortar with fireclay added, so yes I guess you could call it a homemade refractory mortar. But no I haven't purchased a proprietry mortar. The fireclay is supposed to harden the mortar as it heats.
The hearth is built of refractory firebricks as the fire will sit directly on them. The walls and domes are made of clay roading pavers. I chose the pavers because 1. Alan Scott suggested that they had been successfully used for this purpose, 2. They were cheaper than both firebrick and standard clay bricks.
If I was going to use the oven daily I would have used firebricks all around and maybe purchased a refractory mortar. However, realisitically, this oven is not going to be used more than once or twice a month.
Well I downloaded the photos of the completed arches and here they are.
You can see in the photos that the first arch against the back wall sagged a bit so is not quite in alignment with the other two. But they are still up, so I'm going to press on. As my friend Andrew reminds me as I strive for a perfectly level brick A blind man would be pleased to see it! In other words it's good enough, time to move on.
I've got a bit furhter than the photos show, but covered the oven up before I took photos.
Hopefully after this weekend I should have some more progress to report, and photos to post.
you must have progressed further, I'm keen to see and hear how it's going.
BTW something that occured to me while looking over your photos; it appears this is being constructed in a suburban back garden, is that correct?
Did you need to get local council permission to build? Did they stipulate any features to comply with by-laws or regs? Will you need permission to burn?
I just got off the phone from Alan and asked him about "stretcher bond". Alan says that we need to forget everything we ever knew about the design of kilns and older style wood fired ovens (like Scotch Ovens) that use different systems. His design does not require any brick bonding. I wanted to go further with my questioning but it was late and we had talked a while. But basically...Alan does not recommend 'stretcher bond' with his ovens.
I can accept his directive to forget about bonds with his design, but I was curious about the reason why bonds are not employed? Pity you ran out of time. Does Alan visit this board from time to time and answer these types of questions?
Alan was just a bit tired to go into details....but I'll try to find out more next time. He has been very busy and in particular has just imported a flour mill which will be installed in his home town of Oatlands, Tasmania. The mill will be 100% Organic and mill locally grown grain, mainland grain, and other foods as well.
I will encourage Alan to post here personally. We had a web page dedicated to Alan, similar to John Downes page, but for some reason it got left off when the site moved to the new s/w. Alan's page will be back!
Hi sorry for the belated update but March was just crazy with two birthdays and a family holiday at Easter. So unfortunately I haven't made a whole lot of progress and haven't photographed all the progress that I have made. Here is a bit of an update.This is the entrance to the oven and base of the chimney starting to take shape. The front hearth is mainly old firebricks from a friends fireplace with a few new ones "recovered" from the sides of the hearth to make up numbers. It turns out I had the hearth about a brick wider on each side than it absolutely had to be. The pictures below shows some detail of the brickwork. They also show that because of how I'd laid my hearth out to avoid cutting bricks and maximise area combined with the way I designed the front I've ended up with this gap which I'll have to fill to avoid the loose insulation pouring out. My current thought is a perlite cement - insulation and soft enough to take a bit of compresion as the hearth expands. Since these photos were taken I've added a fourth arch of 1/2 bricks because as I mocked up the ramp down to the door I realised that the gap was too wide. Now I've also laid in the lintel for the door at the ratio AS specifies (63 or 66% can't remember which of the top of my head). Next step is to ramp the dome down to the door and close it off. Then I can build the chimney up a bit more. I hope to get the covers off tomorrow and make some more progress. Will get the camera out then.Danubian, to answer a couple of your questions. The dome heaves as it heats so I think the arches are not tied together to provide for a bit of movement. Also the dome is going to be surrounded by re-inforced concrete over foil (to avoid bonding to the brick) this adds mass and stabalises the walls and dome. Finally, yes it is in a suburban backyard. I spent a lot of time talking to the council about it and in the end I discovered that it didn't need a building permit as it wasn't big enough and wouldn't be inhabited. The fire permit people didn't really have a rule that covered it, so the best answer I got was check whether it needs a building consent and then build it. Once it's built we'll come and check it out. I haven't decided yet whether I'm going to be brave enough to tell them when it's finished. I'm getting a bit excited now it's starting to look a bit more like an oven but also a bit depressed about how long it's taking and how much longer it will be before I get to use it. Too many weekend family commitments.Matthew
Thanks for the progress update. It's looking really good and your brickwork is attractive too. Nothing like a beautiful utilitarian object.
Thanks for answering my regulation questions too. I wouldn't be surprised if there's no regulations because these ovens remain uncommon. Anyway, so far so good.
I hope you don't mind I've borrowed one of your pictures and marked it to make my next question clear. Is that gap for the ash pit under the hearth?
Thanks for the compliments Danubian. Yes the slot is for the ashes. Scrape them out of the oven and let them fall down the slot into a big metal bin that will be underneath.
Well with last weekend being ANZAC day and a weekend of pretty good autumn weather I made some more progress on my oven. Unfortunately I can't get the photos into the gallery.
However, the baking chamber is now completely closed in and the chimney arch is complete. Next step is to build the chimney up a bit more.
Hi Matthew, the Gallery is currently 'read only' (working on a fix). Please send your pics to me and I'll post them up here for you - maedi @ sourdough.com.au .
At the start of the weekend the transition had been done but the corners still needed filling in. The door will seat against the firebrick door and the angle iron lintel.
The view in the door.
By the end of the weekends work (a day and a bit of effort) it looked like this.
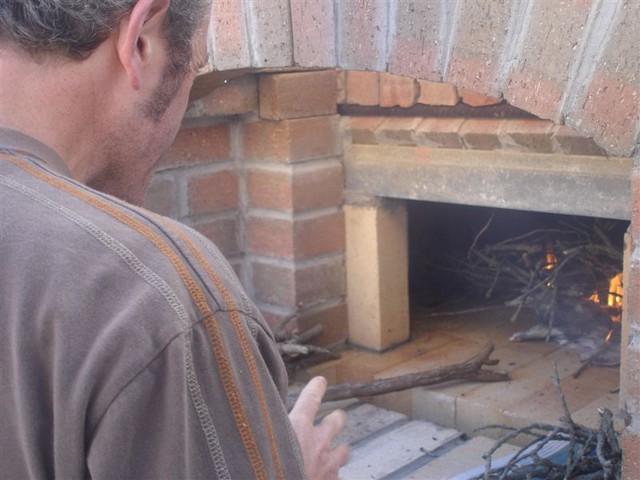
Well it's been a while and quite a bit has happened. The chimney throat has been built up a few courses and the concrete cladding poured. I've even lit a few small fires.
Lighting the very first fire, if you look closely you can see the base of the chimney mocked up where it joins the dome above the door. The rebar is just there to support it a bit.
A fire always attracts a crowd, especially when it's in an oven.
A few weekends later and the cladding is going on the oven dome, about 75mm thick all around. The smoke is from a small fire to warm the dome sop it expands a bit. I wish we had a heater, fires are a lot harder to control and the dome got a bit warmer than planned (I ended up cooling it down with brief squirts of the hose inside)! Such is life!
Close up showing the layer of aluminum foil between the bricks and concrete and the wire re-inforcing mesh. The brick chips are holding the mesh off the foil in the middle of the concrete layer. I was supposed to take them out as I went, but I forgot about 2 or 3 until it was to late to find them in amongst all the concrete.
I mixed about 0.5m3 of concrete by hand, by myself, in one afternoon. I was completely shattered when I finished @7.15pm. The last hour and a half was done with a head lamp, and 15 mins after I finished our babysitter arrived so my wife and I could go out for dinner. So no photos of the finished cladding. I did uncover it a couple days later and take the forms off. You can tell that the top was done in a rush! I'll take photos next time I work on it, in a couple more weeks.
Technically speaking once the cement has cured I could cook in it now, but I'll try and finish the housing, chimney and insulation before I get to carried away using it and never quite get around to finishing it!
I'm just about to commence building an Alan Scott style oven in my backyard. I have a couple of questions on your oven:
What is the size of your oven floor? I noticed in some images that you had themocouples installed, can I ask how many you installed and their location? One thermocouple appears to be coming from the hearth slab (?) was this installed after the slab was laid and cured or during the pouring? And one last one, what type of temperature monitor are you using?
I've got 4 thermocouples installed. One goes into a firebrick in the hearth that has a hole drilled to about 25mm from the cooking surface, so it's not set in the concrete but in the bricks that are laid on top of the concrete and then it just passes down through a hole drilled in the concrete. My thermocouples had not arrived when I laid the hearth so I drilled all the holes and then poked the wire up and cemented it in place later.
The other 3 are in the dome, the first brick above the wall about a third of the way back in the oven. From memory I can't remember exactly which arch. I'd have to look at my notes when I get home tonight. The first one is again drilled into the brick about 25mm from the internal surface, the second at the junction of the bricks and concrete cladding and the third on the outside surface of the concrete cladding.
It's basically the standard arrangement recommended in the Bread Builders.
I haven't used them yet, but I've got a pretty cheap handheld meter that I will plug into the termination of each wire as needed. I'll post a photo once it's finished but that probably won't be for a wee while yet. I still need to get a box to put the terminations in and a mount for the termination block.
I got the wires and terminations from Omega on the advice of Alan Scott and the meter from a local electronics retailer.
The hearth is ever so slightly bigger than the standard 32x36" in the bread builders. I did measure it once, but again it's at home in my notes I think.
Matthew
*edited thermocouple position after checking photos.
Well it's been a while so I thought I should provide an update. Quite a lot has happened and I'm going to skip over the intervening period but if you'd like there are more photos in my gallery showing the various stages I've been through.
This is what the front looks like now.
The whole thing from the front.
To give you a bit of an idea of the size of the beast.
Here's a view of the chimney in behind. Basically I need to put one more row of bricks on the front wall, then finish the chimney. Once I've done that I can pour the insulation in and then put a roof on it.
As an ex potter I am familiar with refractory meterials. Re the question of a suitable refractory mortar. I used a 1/3 fire clay ** 1/3 Cement ** 1.3 sand to build the outer skin of a two chamber stoneware kiln with each chamber 36 cubic feet. I fired this kiln to 1320 degrees C hundreds of times and the morter never moved or deterorated in any way. Of course, the outer skin wasn't at 1320C but it was extremely hot on its inner side. So I think your mix will be fine.
I bought steel re-inforcing mesh from Placemakers, they had 2 wire thicknesses and from memory I bought the smaller one.
The foil is just homebrand household foil. "Heavy duty" types are probably best if you can get them as they won't rip a easily when you're installing it and pouring concrete on it.
Well the chimney and brick frontage are now finished, I have my fire permit (though I need to add a grill on top of the chimney to catch hot embers that might try and escape) and I am now preparing to insulate the oven and put the roof on. After that I will need to make a few ancillary bits like a door, and ash scraper and a peel that reaches all the way back.
It's getting there.
Slowly but surely getting higher.
The chimney is finished in time for Christmas! The pizza party was booked and I'll start a new post to show those pictures.
For posting. I've just stumbled on this site looking for info about sourdough. My brother has long talked about building an oven. I have a better idea of what it entails. Happy baking!
You have done a great job!! I bet you must feel very satisfied with what you have achieved.
I live in Dunedin and have decided a couple of weeks ago to build a brick oven probably identical, well, in the basic design as yours. Can you please tell me if you think the plans are a necessity or if you think the instructions in the Bread Builders book is adequate? I have never done anything like this before, the closest I have come is watching my Dad (a builder) lay blocks too many years ago to remember.
I have also had a look at the plans available from fornobravo, see link below, this resource does not seem to be referred to in the forum here.
Thanks for posting your process, I will have to see if I can do the same when I get going hopefully some time this spring. I decided to try this when we made the decision to remove a brick patio that is past it's useby date, however I now understand I probably won't be able to use too many of the old bricks. But I have go to do it anyway. Is there any thing you would do different were you to do it again? Always good to ask that question.
Sorry for the delay, I've not been on the site much lately - too busy around the house and at work.
Yes I did buy his plans, and I did find them useful, particularly around having a diagram with measurements and a bit more detail around the chimney throat. Though the chimney details are the least detailed part of the oven. I spend a lot of time on the web looking at other peoples photos of their chimneys and ovens. I think with the web and the brickoven group on yahoo you could probably get through without the plans.
I overheated the oven a bit when warming it to pour the cladding - next time I'd stop the heat while the outside is still cool, it takes quite a long time for the heat to come through to the outside, and by then you've heated the inside too much and so the outside gets gradually hotter and hotter and it's not too good for the cement. Using a heater rather than a fire would be better too. I also mixed the cladding cement by hand, by myself, next time I'd hire a concrete mixer again - it's more cement than the book lets on, particularly by yourself.
Also after you've laid a few bricks in the oven wall up against the door jamb, go back and check the door jam is still plumb with the other side. The bedding in of the other bricks moved my jamb slightly and I didn't find out until I got all the way around to the other side of the door, and that was not on the same day, so by then it was set in place and not quite square.
I used a grinder and masonary cutting blade and a brick set. A proper brick saw would be much quicker and easier, but much more expensive and not really necessary.
Replies
if i can ask, what plan you follow with your project ?
i knew that regadless what oven i would build i would need a slab and got this done 2 months ago but i still didn't decided on specific oven designe
Croc,
I purchased plans from Alan Scott @ [url=http://www.ovencrafters.net/]Ovencrafters[/url], he's now based back in Tasmania. "The Bread Builders" by Dan Wing has a lot of additional information about building using Alan's plans.
There's also another guy in Australia called Rado @ [url=http://www.traditionaloven.com/index.html]traditional oven[/url] that others have used for plans. I've read his site and looked at his pictures but have not viewed his plans of CDs of photos. Similar concept to Alan, but a number of differences I believe.
Happy planning
Regards Matthew
how do you go about getting fuel (trees?) in australia?
Well,
Progress continues to be made, much to my amazement!
[img]http://www.sourdough.com.au/gallery/d/10739-1/DSC00671.JPG[/img]
The firebrick hearth going down
[img]http://www.sourdough.com.au/gallery/d/10743-1/DSC00673.JPG[/img]
A close up of the hearth layers, bottom is the insulating layer, then the concrete and firebrick layers that form the thermal mass to store all that lovely heat
[img]http://www.sourdough.com.au/gallery/d/10745-1/DSC00677.JPG[/img]
The fireclay and sand bedding for the firebricks. There is no cement in the mix in case I need to replace a brick in the future.
[img]http://www.sourdough.com.au/gallery/d/10747-1/DSC00695.JPG[/img]
Here's a picture of the hearth all laid out. It is basically level and basically flat! A few high and low points which will make it a bit harder to sweep out before baking, about 3 slightly wobbly bricks (which I expect to bed down as ashes work down between the bricks) and the odd slightly wider gap. But all in all not too bad for a first time I think, the quality improved as I went.
[img]http://www.sourdough.com.au/gallery/d/10749-1/DSC00696.JPG[/img]
I managed to layout back wall before I ran out of time (note that I'm using roading quality pavers instead of firebrick or red brick for the walls and dome). Next step is to finish laying out the oven walls and then mortar them in place. Then on to the dome and my first ever brick arch..
There are a couple more pictures [url=http://sourdough.com.au/?q=gallery&g2_itemId=4220&g2_page=3]here[/url]
Regards
Matthew
Great job, Matthew! Yes! We're going to see breads soon.
Looks really nice - One day I would like to have an oven too - I think though that my current house neighborhood will not allow for an oven like that in my back yard.
Andrew
We will wait in anticipation Matthew!
Jeremy
[size=24][b]Pix, Pix, Pix!![/b][/size]
Go, Matthew, go!
Is it an Alan Scott or home made oven?
Jeremy
I'm using Alan's plans & Bread Builder's instructions but am having to convert everything from imperial and US products to metric and NZ products (blocks and bricks are different sizes here as well as being in metric). So it's going to come out a little different.
I'm a bit embarrassed on two fronts. One that it took almost exactly 10 months to post photos, and secondly that the oven still isn't finished. However the hearth is finally poured, and I'm ready to lay bricks! OK I've got to buy the firebricks and thermocouples first, but then I'm ready.
My brick oven to date, hearth slab poured, finally time for some bricks. YAH!!
[img]http://www.sourdough.com.au/gallery/d/10731-1/DSC00423.JPG[/img]
This is how it all started back in Jan.
[img]http://www.sourdough.com.au/gallery/d/10733-1/DSC07710.JPG[/img]
Before the hole it was an idea and a space.
[img]http://www.sourdough.com.au/gallery/d/10735-1/DSC07707.JPG[/img]
With summer starting and longer evenings I'm targeting a functional oven (not finished but with a fire in it) by New Years. Wish me luck!
Matthew
Looks really handsome so far! Feeling so excited for you.
I wonder if I wish hard enough I'd get one next year?
Time for another update on the brickoven. I've actually got a bit further than this, I've now laid the front hearth and the 2nd and 3rd arches on the dome. So I'm almost ready to close in the dome. But those photos are still on the camera. I'll download them another time.
Here's what it looked like all braced up ready for the dome to go on the walls.
Mocking up the first arch.
Laying the first arch.
Much to my relief it held. it sagged slightly because I hadn't notice but the right hand side wasn't as tight to the template as it should have been, so the arch is a bit wider on the RHS than designed. I fixed this tendency in the next 2 arches, but you'll have to wait for the photographs to prove it.
Matthew
Good luck with yours - I look forward to watching further building progress!
Hi Matt,
Just curious if you're using refractory mortar?
In fact, are those bricks used in the side and back walls, and the arch, refractory bricks? I can see the hearth constitutes refractory bricks but I can't tell if the others are.
The mortar is a portland sand mix modified with fireclay (3 parts portland, 1 1/2 parts fireclay, 10 parts sand from memory - the numbers just don't stick in my head, I have to check each time). The wall bricks are actually 65mm road quality clay pavers. Chosen because they are very dense and also were readily available and cheaper than both firebrick and clay brick (proper, solid, clay bricks are actually quite hard to find in NZ, they tend to be imported from Australia, the local bricks are generally half width facade bricks).
If the oven was going to be used every day I would have used firebrick for the wall and dome, and would have considered a proprietry refractory mortar. But realisitically this oven won't be used more than once or twice a month, so the advice I received from a number of sources is that the extra expense this would entail was not necessary.
Matthew
how it all goes as well as see how it lasts over a couple of years.
I'd have thought making it in such a way to last more than one life time would be more prudent. Unless you plan on making another down the track for your children or grandchildren.
Beside that it looks like a great project and you seem to have it worked out.
Anyway, good luck with it and keep posting.
From what I've been able to find out, the refractory bricks/mortar are really only necessary for repeated and frequent temperature cycling of the walls and dome.
I'd build for more than one lifetime in mind if I thought it likely that my children/grandchildren would be living in the same house after I die. But here in NZ that is extremely unlikely....
Also the firebricks cost me approx $6.60 each, while the pavers cost me $1 each. So their wasn't really too much consideration given to using firebricks throughout once I was confident that I didn't really need them.
Will keep posting as I go, but can't promised that it will be finished anytime soon based on experience to date :)
Matthew
Now I see that i've posted this twice...... I came back in and couldn't see my original reply, so did it again. I'm still getting used to the new site.
I'm using a portland mortar with fireclay added, so yes I guess you could call it a homemade refractory mortar. But no I haven't purchased a proprietry mortar. The fireclay is supposed to harden the mortar as it heats.
The hearth is built of refractory firebricks as the fire will sit directly on them. The walls and domes are made of clay roading pavers. I chose the pavers because 1. Alan Scott suggested that they had been successfully used for this purpose, 2. They were cheaper than both firebrick and standard clay bricks.
If I was going to use the oven daily I would have used firebricks all around and maybe purchased a refractory mortar. However, realisitically, this oven is not going to be used more than once or twice a month.
Matthew
Well I downloaded the photos of the completed arches and here they are.
You can see in the photos that the first arch against the back wall sagged a bit so is not quite in alignment with the other two. But they are still up, so I'm going to press on. As my friend Andrew reminds me as I strive for a perfectly level brick A blind man would be pleased to see it! In other words it's good enough, time to move on.
I've got a bit furhter than the photos show, but covered the oven up before I took photos.
Hopefully after this weekend I should have some more progress to report, and photos to post.
Matthew
you must have progressed further, I'm keen to see and hear how it's going.
BTW something that occured to me while looking over your photos; it appears this is being constructed in a suburban back garden, is that correct?
Did you need to get local council permission to build?
Did they stipulate any features to comply with by-laws or regs?
Will you need permission to burn?
...... completed arches and here they are.
[/quote]
One more question; I've noted that the arches are not tied together with a brick bond such as a 'stretcher bond'; why is that?
I'd have thought it would be stronger if it was all - arches and walls were - tied together with a bond.
I will encourage Alan to post here personally. We had a web page dedicated to Alan, similar to John Downes page, but for some reason it got left off when the site moved to the new s/w. Alan's page will be back!
Hi sorry for the belated update but March was just crazy with two birthdays and a family holiday at Easter. So unfortunately I haven't made a whole lot of progress and haven't photographed all the progress that I have made. Here is a bit of an update.This is the entrance to the oven and base of the chimney starting to take shape. The front hearth is mainly old firebricks from a friends fireplace with a few new ones "recovered" from the sides of the hearth to make up numbers. It turns out I had the hearth about a brick wider on each side than it absolutely had to be. The pictures below shows some detail of the brickwork. They also show that because of how I'd laid my hearth out to avoid cutting bricks and maximise area combined with the way I designed the front I've ended up with this gap which I'll have to fill to avoid the loose insulation pouring out. My current thought is a perlite cement - insulation and soft enough to take a bit of compresion as the hearth expands. Since these photos were taken I've added a fourth arch of 1/2 bricks because as I mocked up the ramp down to the door I realised that the gap was too wide. Now I've also laid in the lintel for the door at the ratio AS specifies (63 or 66% can't remember which of the top of my head). Next step is to ramp the dome down to the door and close it off. Then I can build the chimney up a bit more. I hope to get the covers off tomorrow and make some more progress. Will get the camera out then.Danubian, to answer a couple of your questions. The dome heaves as it heats so I think the arches are not tied together to provide for a bit of movement. Also the dome is going to be surrounded by re-inforced concrete over foil (to avoid bonding to the brick) this adds mass and stabalises the walls and dome. Finally, yes it is in a suburban backyard. I spent a lot of time talking to the council about it and in the end I discovered that it didn't need a building permit as it wasn't big enough and wouldn't be inhabited. The fire permit people didn't really have a rule that covered it, so the best answer I got was check whether it needs a building consent and then build it. Once it's built we'll come and check it out. I haven't decided yet whether I'm going to be brave enough to tell them when it's finished. I'm getting a bit excited now it's starting to look a bit more like an oven but also a bit depressed about how long it's taking and how much longer it will be before I get to use it. Too many weekend family commitments.Matthew
Thanks for answering my regulation questions too. I wouldn't be surprised if there's no regulations because these ovens remain uncommon. Anyway, so far so good.
I hope you don't mind I've borrowed one of your pictures and marked it to make my next question clear. Is that gap for the ash pit under the hearth?
[IMG]http://i22.photobucket.com/albums/b317/plutrach/Mattsovenstocklabeled.pn...
Matthew
Yes, I was also admiring the brickwork. Thanks for the brick by brick progress.
However, the baking chamber is now completely closed in and the chimney arch is complete. Next step is to build the chimney up a bit more.
Matthew
Maedi
At the start of the weekend the transition had been done but the corners still needed filling in. The door will seat against the firebrick door and the angle iron lintel.
The view in the door.
By the end of the weekends work (a day and a bit of effort) it looked like this.
The chimney arch was up.
And the corners filled in.
The inside of the corners.
Next job is to build the chimney up a bit more.
Matthew
Well it's been a while and quite a bit has happened. The chimney throat has been built up a few courses and the concrete cladding poured. I've even lit a few small fires.
Lighting the very first fire, if you look closely you can see the base of the chimney mocked up where it joins the dome above the door. The rebar is just there to support it a bit.
A fire always attracts a crowd, especially when it's in an oven.
A few weekends later and the cladding is going on the oven dome, about 75mm thick all around. The smoke is from a small fire to warm the dome sop it expands a bit. I wish we had a heater, fires are a lot harder to control and the dome got a bit warmer than planned (I ended up cooling it down with brief squirts of the hose inside)! Such is life!
Close up showing the layer of aluminum foil between the bricks and concrete and the wire re-inforcing mesh. The brick chips are holding the mesh off the foil in the middle of the concrete layer. I was supposed to take them out as I went, but I forgot about 2 or 3 until it was to late to find them in amongst all the concrete.
I mixed about 0.5m3 of concrete by hand, by myself, in one afternoon. I was completely shattered when I finished @7.15pm. The last hour and a half was done with a head lamp, and 15 mins after I finished our babysitter arrived so my wife and I could go out for dinner. So no photos of the finished cladding. I did uncover it a couple days later and take the forms off. You can tell that the top was done in a rush! I'll take photos next time I work on it, in a couple more weeks.
Technically speaking once the cement has cured I could cook in it now, but I'll try and finish the housing, chimney and insulation before I get to carried away using it and never quite get around to finishing it!
Matthew
Nice oven!!!
I'm just about to commence building an Alan Scott style oven in my backyard. I have a couple of questions on your oven:
What is the size of your oven floor?
I noticed in some images that you had themocouples installed, can I ask how many you installed and their location? One thermocouple appears to be coming from the hearth slab (?) was this installed after the slab was laid and cured or during the pouring? And one last one, what type of temperature monitor are you using?
Cheers!
I've got 4 thermocouples installed. One goes into a firebrick in the hearth that has a hole drilled to about 25mm from the cooking surface, so it's not set in the concrete but in the bricks that are laid on top of the concrete and then it just passes down through a hole drilled in the concrete. My thermocouples had not arrived when I laid the hearth so I drilled all the holes and then poked the wire up and cemented it in place later.
The other 3 are in the dome, the first brick above the wall about a third of the way back in the oven. From memory I can't remember exactly which arch. I'd have to look at my notes when I get home tonight. The first one is again drilled into the brick about 25mm from the internal surface, the second at the junction of the bricks and concrete cladding and the third on the outside surface of the concrete cladding.
It's basically the standard arrangement recommended in the Bread Builders.
I haven't used them yet, but I've got a pretty cheap handheld meter that I will plug into the termination of each wire as needed. I'll post a photo once it's finished but that probably won't be for a wee while yet. I still need to get a box to put the terminations in and a mount for the termination block.
I got the wires and terminations from Omega on the advice of Alan Scott and the meter from a local electronics retailer.
The hearth is ever so slightly bigger than the standard 32x36" in the bread builders. I did measure it once, but again it's at home in my notes I think.
Matthew
*edited thermocouple position after checking photos.
This is what the front looks like now.
The whole thing from the front.
To give you a bit of an idea of the size of the beast.
Here's a view of the chimney in behind. Basically I need to put one more row of bricks on the front wall, then finish the chimney. Once I've done that I can pour the insulation in and then put a roof on it.
I also need to mount my thermocouple terminations somewhere, then I'll be cooking with wood....
Matthew
Hi there
Nice oven!
Could you please let me know where you get a wire mesh like that for the dome? Also, is the foil normal cooking foil, and if so what thickness.
Many thanks
Martin Noakes
I bought steel re-inforcing mesh from Placemakers, they had 2 wire thicknesses and from memory I bought the smaller one.
The foil is just homebrand household foil. "Heavy duty" types are probably best if you can get them as they won't rip a easily when you're installing it and pouring concrete on it.
Matthew
I'm in the U.K so; I presume it was a flat wide section of wires and you bent it to fit your design.
Martin
That is correct. A sheet of steel reinforcing mesh bent to shape.
Matthew
Well the chimney and brick frontage are now finished, I have my fire permit (though I need to add a grill on top of the chimney to catch hot embers that might try and escape) and I am now preparing to insulate the oven and put the roof on. After that I will need to make a few ancillary bits like a door, and ash scraper and a peel that reaches all the way back.
It's getting there.
Slowly but surely getting higher.
The chimney is finished in time for Christmas! The pizza party was booked and I'll start a new post to show those pictures.
Matthew
Happy baking!
Hi Matthew,
You have done a great job!! I bet you must feel very satisfied with what you have achieved.
I live in Dunedin and have decided a couple of weeks ago to build a brick oven probably identical, well, in the basic design as yours. Can you please tell me if you think the plans are a necessity or if you think the instructions in the Bread Builders book is adequate? I have never done anything like this before, the closest I have come is watching my Dad (a builder) lay blocks too many years ago to remember.
I have also had a look at the plans available from fornobravo, see link below, this resource does not seem to be referred to in the forum here.
http://www.fornobravo.com/store/Instruction-Manuals-and-eBooks-p-1-c-260...
Thanks for posting your process, I will have to see if I can do the same when I get going hopefully some time this spring. I decided to try this when we made the decision to remove a brick patio that is past it's useby date, however I now understand I probably won't be able to use too many of the old bricks. But I have go to do it anyway. Is there any thing you would do different were you to do it again? Always good to ask that question.
Cheers again.
Hi!
Nice job on the oven. Do you mind me asking roughly what it cost you to complete... well, at least, what it cost you in dollars? :)
Cheers,
Scott.
Sorry for the delay, I've not been on the site much lately - too busy around the house and at work.
Yes I did buy his plans, and I did find them useful, particularly around having a diagram with measurements and a bit more detail around the chimney throat. Though the chimney details are the least detailed part of the oven. I spend a lot of time on the web looking at other peoples photos of their chimneys and ovens. I think with the web and the brickoven group on yahoo you could probably get through without the plans.
I overheated the oven a bit when warming it to pour the cladding - next time I'd stop the heat while the outside is still cool, it takes quite a long time for the heat to come through to the outside, and by then you've heated the inside too much and so the outside gets gradually hotter and hotter and it's not too good for the cement. Using a heater rather than a fire would be better too. I also mixed the cladding cement by hand, by myself, next time I'd hire a concrete mixer again - it's more cement than the book lets on, particularly by yourself.
Also after you've laid a few bricks in the oven wall up against the door jamb, go back and check the door jam is still plumb with the other side. The bedding in of the other bricks moved my jamb slightly and I didn't find out until I got all the way around to the other side of the door, and that was not on the same day, so by then it was set in place and not quite square.
I used a grinder and masonary cutting blade and a brick set. A proper brick saw would be much quicker and easier, but much more expensive and not really necessary.
Good luck and drop me a line if you need.
Matthew
Sorry Scott but I haven't totaled it all up yet, I did try to keep most of my receipts, but I'm not sure I'll ever get it added up.
It was more than NZD2000 (the fire bricks themselves were more than $600 and I only did the floor in firebricks).
I did have to buy a few tools that I didn't have previously which made it more expensive for me than someone with a good tool kit to start with.
Regards
Mattehw
Pages